Published on:
Tips & Tricks That Sell
You only get one chance to make a first impression and top-notch photography gets more buyers to click on your listing. Whether you’re an aspiring amateur or a seasoned professional, great real estate photography requires a unique balance of style, technique, and technology. Follow the tips and tricks in this beginner’s guide and your next real estate photography project will be a snap!
Clean & Declutter
Even the most tidy of homes can benefit from a deep clean. Ask your sellers to wash windows and mirrors, dust, vacuum, scrub floors, and get fingerprints off those stainless steel appliances. After everything is sparkling, don’t reintroduce items that cause clutter; ask your sellers to clear counters of appliances and toiletries, stash wires and cords, and remove personal belongings. Outside counts too, pressure wash exteriors and driveways, rake leaves, mow the lawn, pull weeds, trim hedges, etc.
Setting the Stage
Minimal furnishings give a room sense of scale and makes it easier for people to envision their own belongings in a space. Consider working with a professional stager, or check out online staging resources for inspiration ranging from color palettes to furniture placement.
Add Accents
A splash of color can really add some pizazz to a photo. Think fresh flowers, bowls of fruit, rugs, throw pillows, or an artfully draped blanket.
Your Camera Counts
Smart phones have come a long way, but they can never replace a good-quality DSLR camera. If you aren’t hiring a professional photographer, consider other accessories that will take your photos to the next level, including a wide-angle lens, tripod, remote trigger, and external flash unit.
Timing is Everything
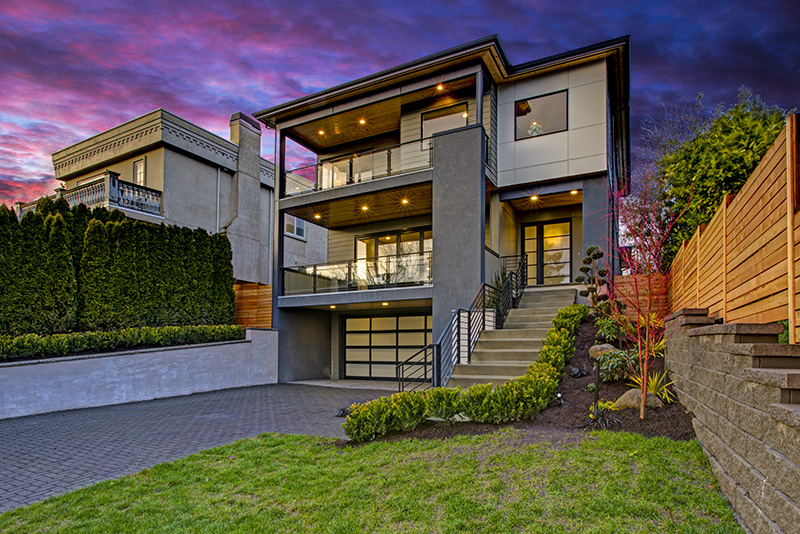
Does the home capture the early morning light? Fabulous sunsets? The sparkling lights of the city? If you have the time, it can be well worth the effort to take photos throughout the day to show the home at its best. Exterior shots are best at dusk, also known as the Golden Hour. Interior shots are best when the sun is shining, which can be a challenge in the Pacific Northwest. If you simply can’t catch a sunny day, make sure to turn on lights, open blinds, and bring your own backup lighting if possible.
Take Lots of Photos
With digital cameras you can take as many shots as you like and simply delete photos that don’t make the cut. Make sure to take shots of each room from different angles and review as you go to make sure you get the best, most accurate perspective.
Quality Over Quantity
More is not always better. While the maximum number of photos that can be uploaded to NWMLS is 40, aim for 20 to 30 images. Don’t waste space with multiple shots of the same room (even if the kitchen remodel is ah-mazing!). Instead post one or two shots of each room or feature. If your listing states there are three bedrooms and two bathrooms: show them. Omissions can cause buyers to question whether there is something to hide.
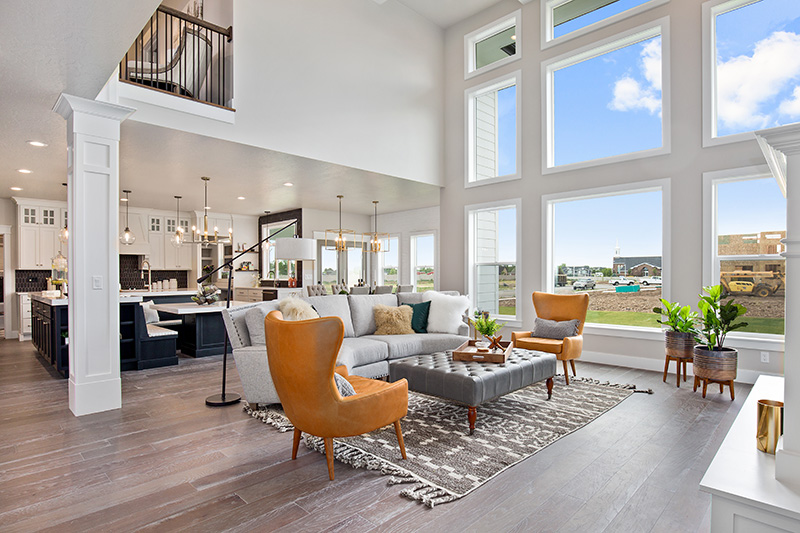
Must-have & Nice-to-have Photos
The most important shots for your listing’s slideshow include: the exterior, kitchen, living room, primary bedroom, and main bathroom. Typically an exterior shot is used as the primary photo, however the primary photo can be an interior photo (especially for condos), as long as an exterior photo, a rendering of the property, or a view shot from the property is included as an additional picture.
It’s also nice to show off additional features like outdoor space, garage or outbuildings, a pool or hot tub, views, architectural details, aerial shots, and popular local features. Just don’t get too far from home on the local features…try to limit to this to within a several block radius.
Just as important as what is IN your listing’s photos, there are a few thing that should definitely NOT be in your photos. Please be mindful of these photo faux pas.
Nothing Personal

Absolutely no people or pets in any photos, including a reflection of the photographer in a window or mirror. It’s also a good idea to remove family photos and items printed with family names. Please note: due to safety and security reasons, never include images with children in your listing.
Don’t Distort
Take a pass on tiny rooms that don’t photograph well like closets and utility rooms. Wide-angle lenses can help, but often distort images and can portray an unrealistic sense of size. Also avoid images that are out of focus, blurry, crooked, or too difficult to make out.
Minimize Eyesores
Don’t take exterior shots on garbage day! Consider asking neighbors to temporarily move vehicles, lawn tools, recreational equipment, and other unsightly items to get a “clean” shot of the home. Also keep in mind what’s visible out the window when taking interior shots and change your angle accordingly.
No Manipulation
Do not manipulate images in a way that misrepresents what is for sale. Examples: removing the power lines, adding a lawn, adding a driveway, or removing any property defects.
Ban Branding
Do not add your contact info, logos, or watermarks to your listing images. NWMLS will not accept photos with superimposed graphics or text.
No Combos
Do not try to combine multiple photos into one image. Not only is this more work than it’s worth, these types of images are also not allowed to be in your NWMLS listing.
Bar the Barcodes
Two dimensional barcodes, “2D codes”, such as QR codes and Microsoft Tags, contain patterns of black-and-white blocks or colored shapes that can be scanned by smartphones to bring up a website. It’s perfectly fine to add 2D codes to signs or flyers so potential buyers can scan the code and view additional property information on their smartphones, but this is not permitted on listing photos.
Click here for more information on NWMLS’s photo policy. Now that you know the basics, you’re on your way to becoming a real estate photography pro!